 Loading... Please wait...
ศูนย์จำหน่ายอุปกรณ์เน็ตเวิร์คชั้นนำ ในประเทศไทย
หมวดหมู่สินค้า
- Network
- 10/100 Switch
- 100/1000 Switch
- 2.5-10 Gbps Switch
- Accessorie
- ADSL2+ Modem/Router
- Facebook WiFi
- IP Camera
- L2/L3 Switch
- LAN Cable
- Load Balance Router
- Mesh WiFi
- NAS
- Outdoor Wireless Access Point
- PCI Express Wireless Adapter
- PoE Adapter
- PoE Switch
- Range Extender
- Smart Plug
- USB Wireless Adapter
- USB Wireless Adapter (AC)
- USB Wireless Adapter (AX)
- USB Wireless Adapter (High Power)
- VDSL Modem/Router
- VPN Router
- WiFi Bridge/Repeater
- Wireless Access Point
- Wireless Access Point (High Power)
- Wireless Access Point (Indoor)
- Wireless Controller
- Wireless Router
- Wireless Router (AC)
- Wireless Router (AX)
- Wireless Router (BE)
- Wireless Router (Dual-Band)
- Wireless Router (High Power)
- Wireless Router (Mini)
แบรนด์ยอดนิยม
ลงทะเบียนรับข่าวสาร
- หน้าแรก
- คู่มือการตั้งค่า Huawei E5573Bs-322 สำหรับ AIS, DTAC, TRUE, TOT, MY
คู่มือการตั้งค่า Huawei E5573Bs-322 สำหรับ AIS, DTAC, TRUE, TOT, MY
เริ่มตั้งค่า Huawei E5573Bs-322 โดยเปิดเครื่อง Huawei E5573Bs-322 แล้วเชื่อมต่อ WiFi กับคอมพิวเตอร์ (ชื่อ WiFi และรหัสผ่านอยู่ที่ฝาหลังหรือที่ตัวเครื่องตรงใต้แบตเตอรี่)
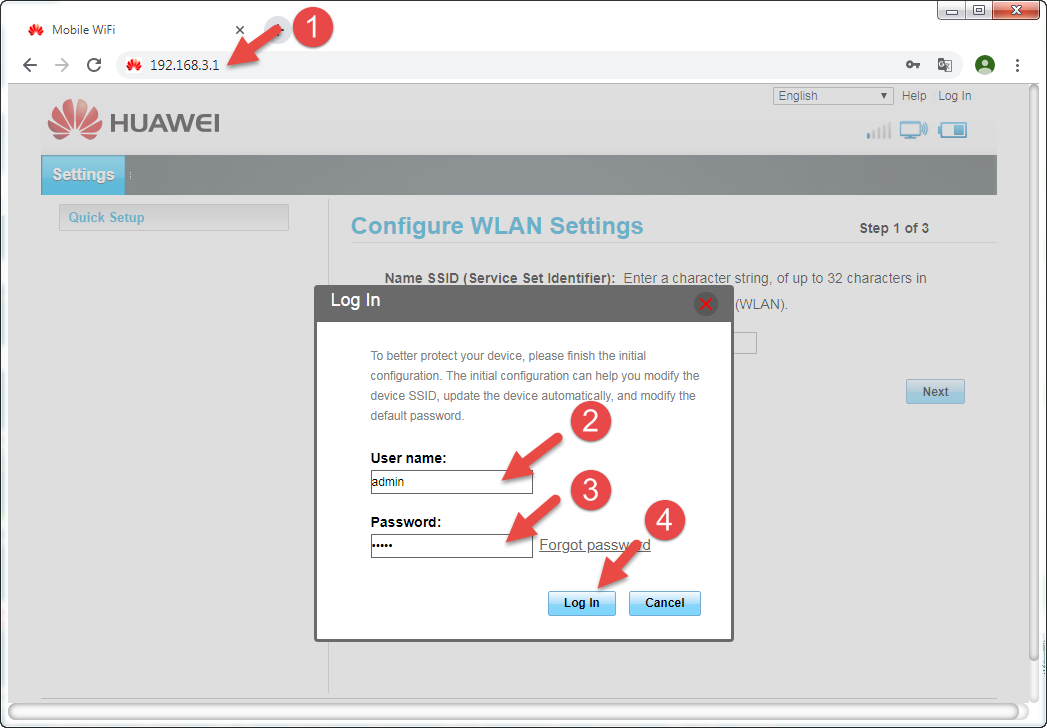
1. เปิดเว็บ Browser (Chrome/IE/Firefox) เข้าสู่หน้าตั้งค่า
- พิมพ์ 192.168.3.1 กด Enter
- พิมพ์ User Name = admin
- พิมพ์ Password = admin (สำหรับเครื่องที่เราตั้งค่าให้แล้ว Password = admin1234 และข้ามไปที่ข้อ 5 ได้เลย)
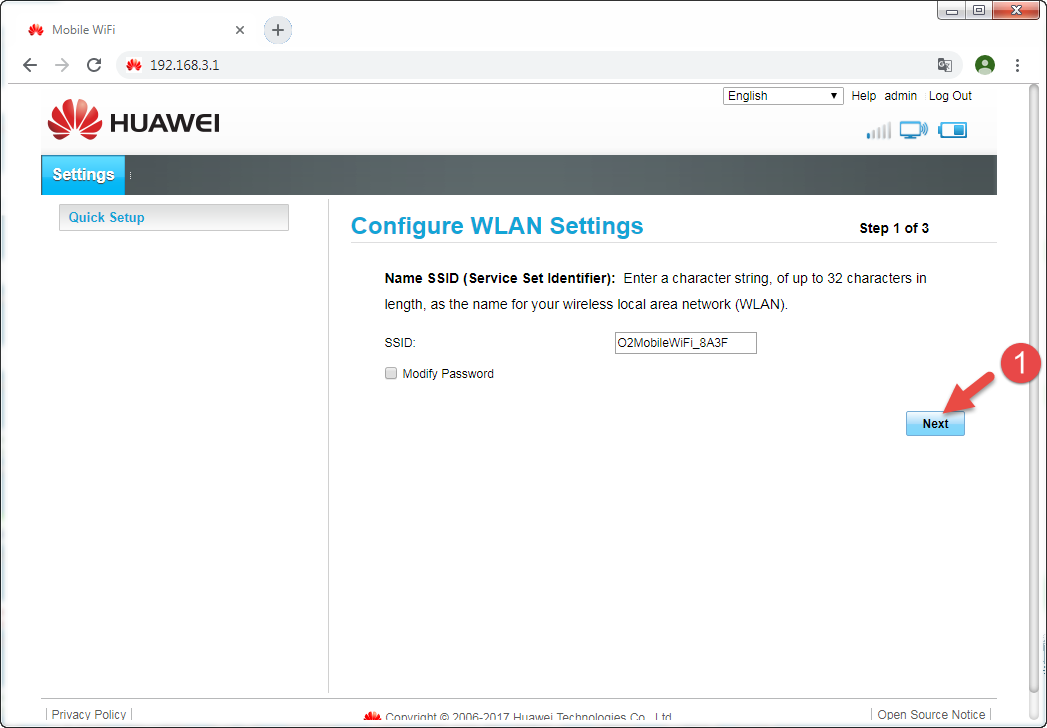
2. คลิก Next
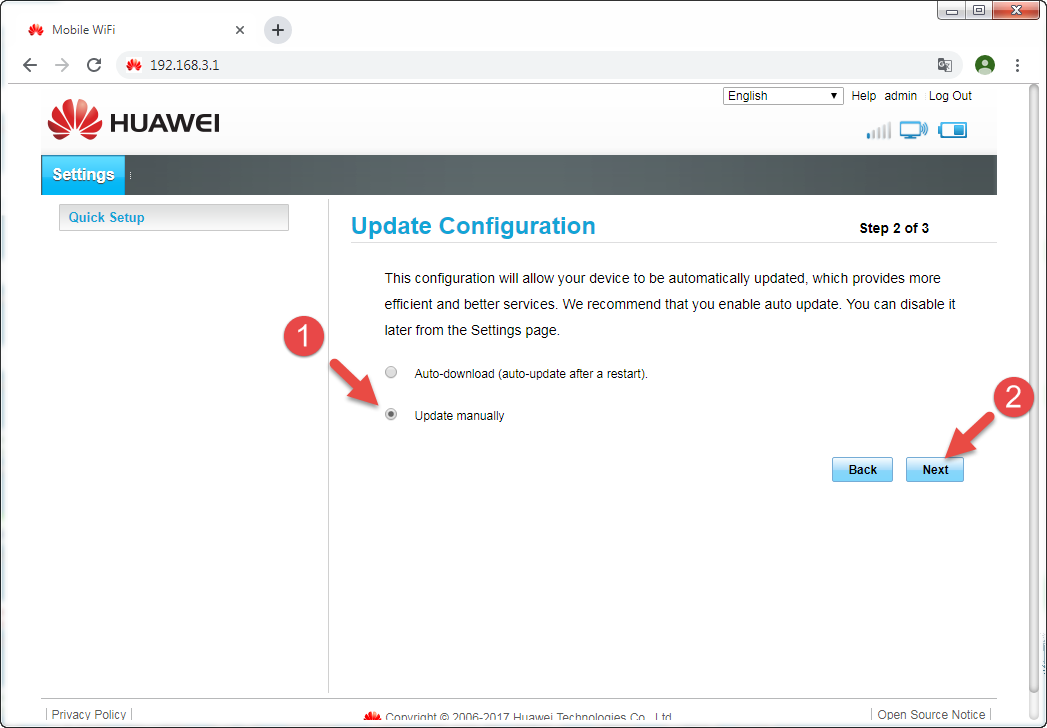
3. กำหนดการ Update firmware/software
- เลือก Update manually (ไม่เลือก Auto เพราะว่าของใหม่ไม่ได้ดีเสมอไป)
- คลิก Next
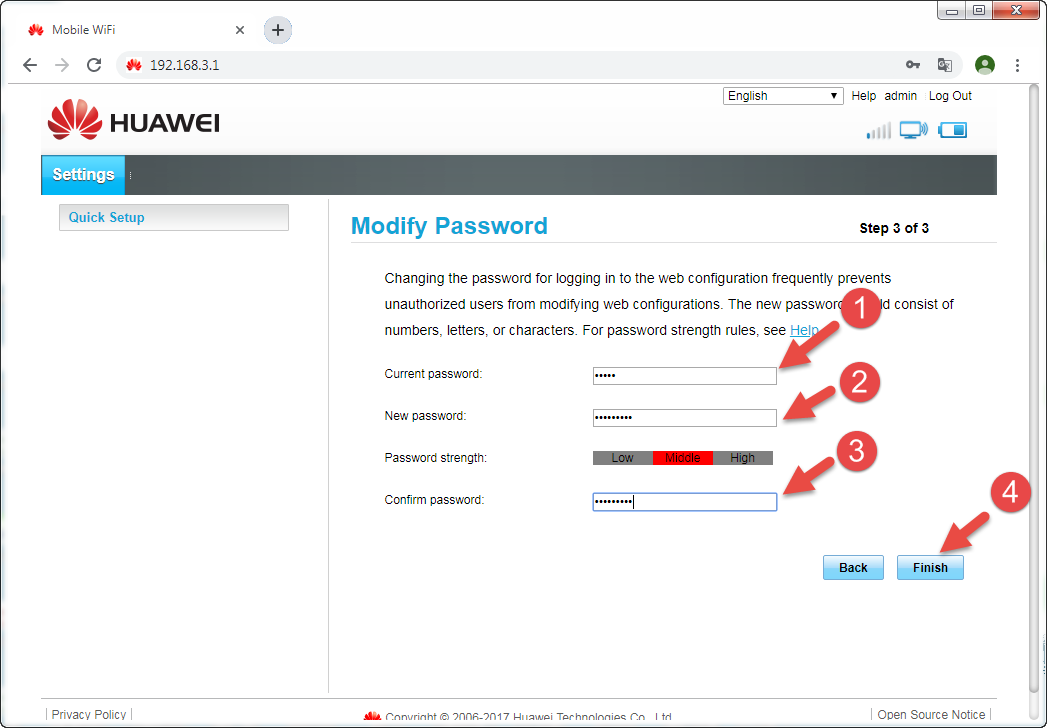
4. ตั้งค่ารหัสผ่าน admin ใหม่ (ระบบบังคับให้ตั้งค่าใหม่)
- พิมพ์รหัสผ่านเดิม
- พิมพ์รหัสผ่านใหม่
- พิมพ์ยืนยันรหัสผ่านใหม่
- คลิก Finish
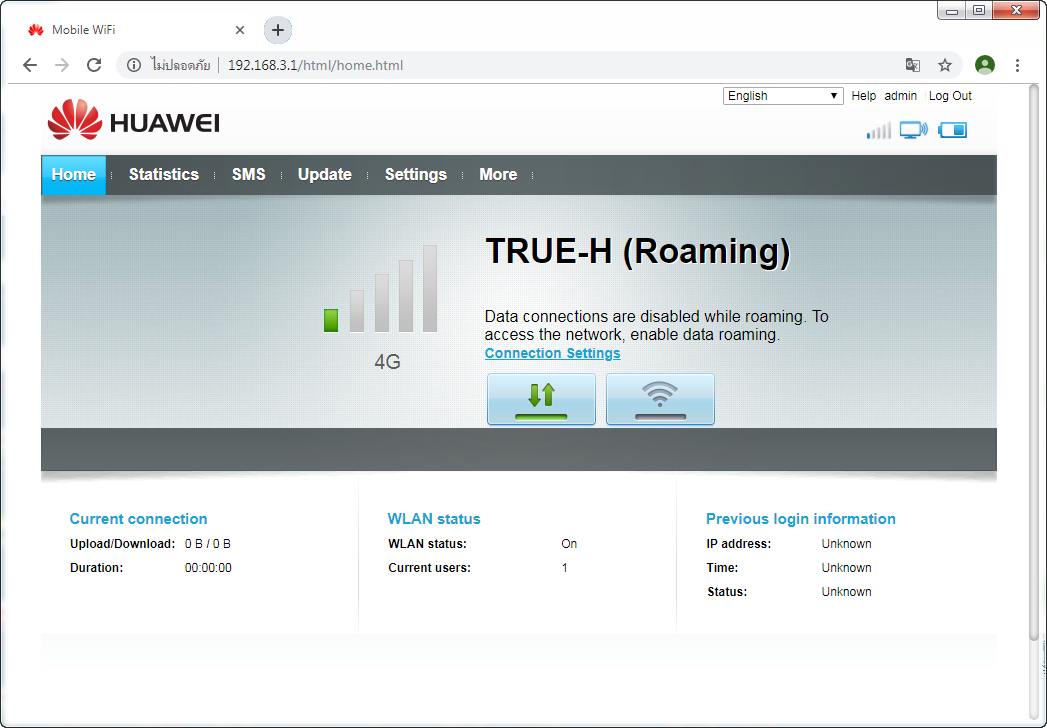
5. ตรวจสอบหน้าสถานะว่าพร้อมใช้งานหรือไม่ (ปัจจุบันในไทยมีหลายซิมที่ต้องเปิด Roaming ก่อนจึงใช้งานได้ ให้ตั้งค่าตามข้อ 6)
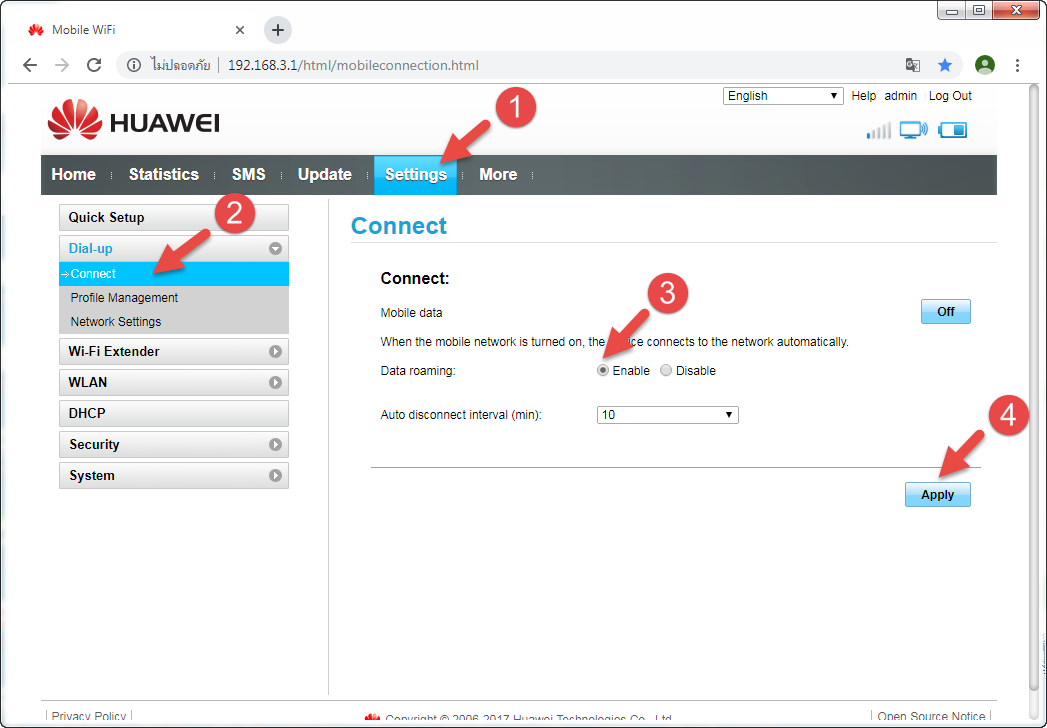
6. ตั้งค่าเปิด Roaming
- คลิก Settings
- คลิก connect
- เลือก Enable
- คลิก Apply
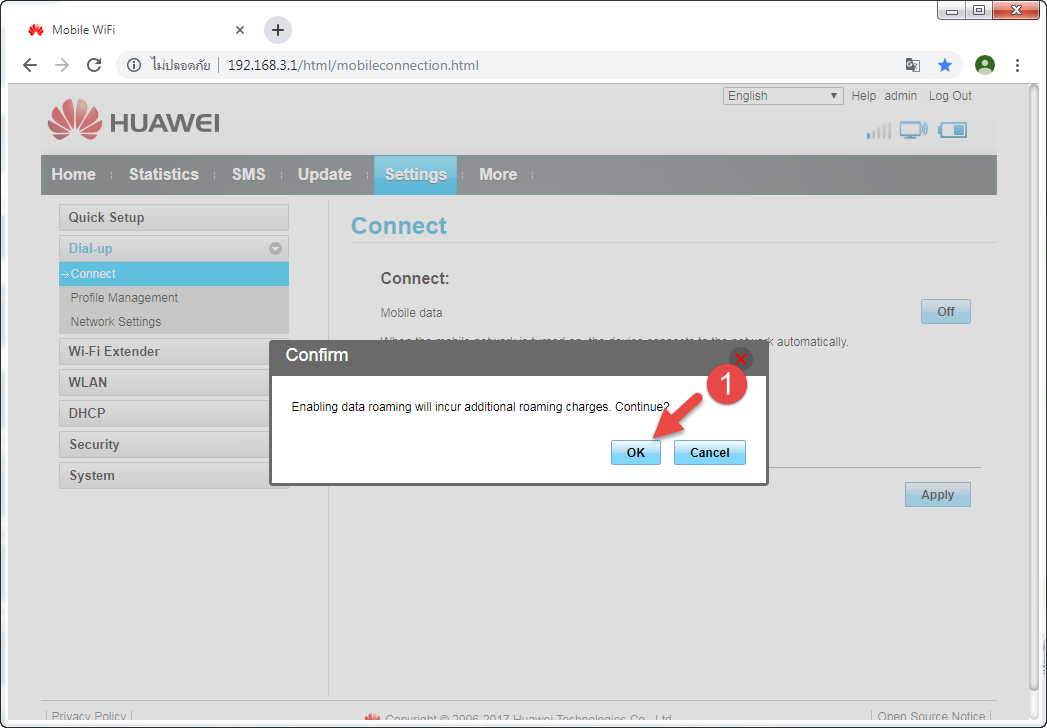
5. คลิก OK เพื่อยืนยันการเปิด Roaming
7. บางซิมอาจต้องตั้งค่า APN (Profile Management) ส่วนใหญ่ไม่ต้องตั้งค่า ให้ตั้งตามนี้
- คลิก Settings
- คลิก Profile Management
- คลิก New Profile
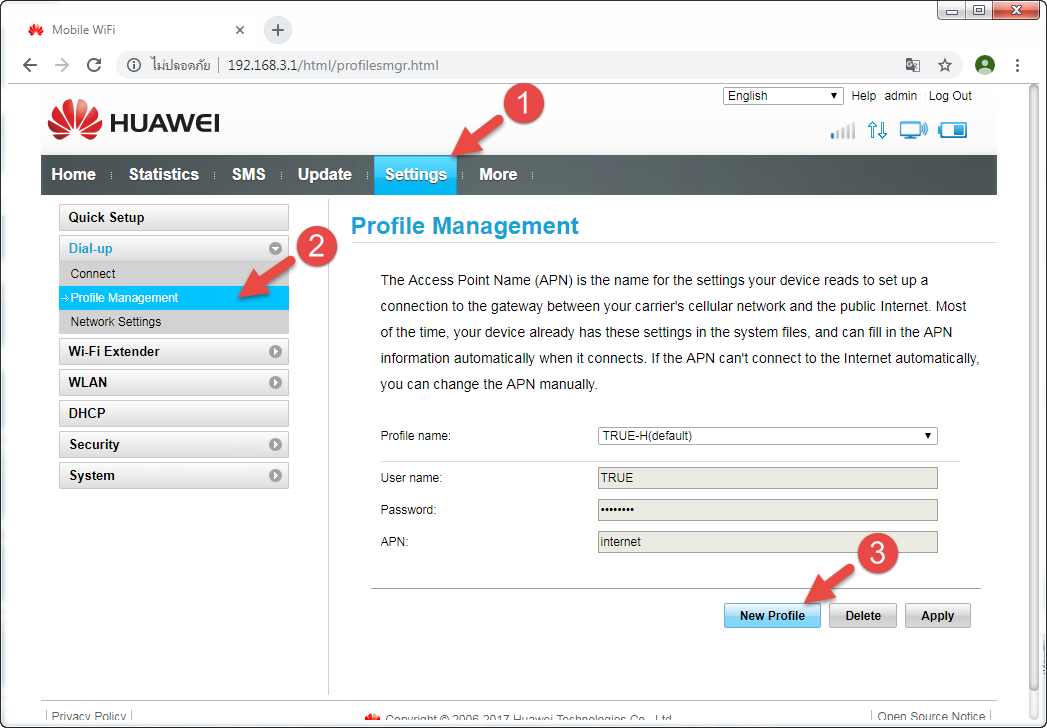
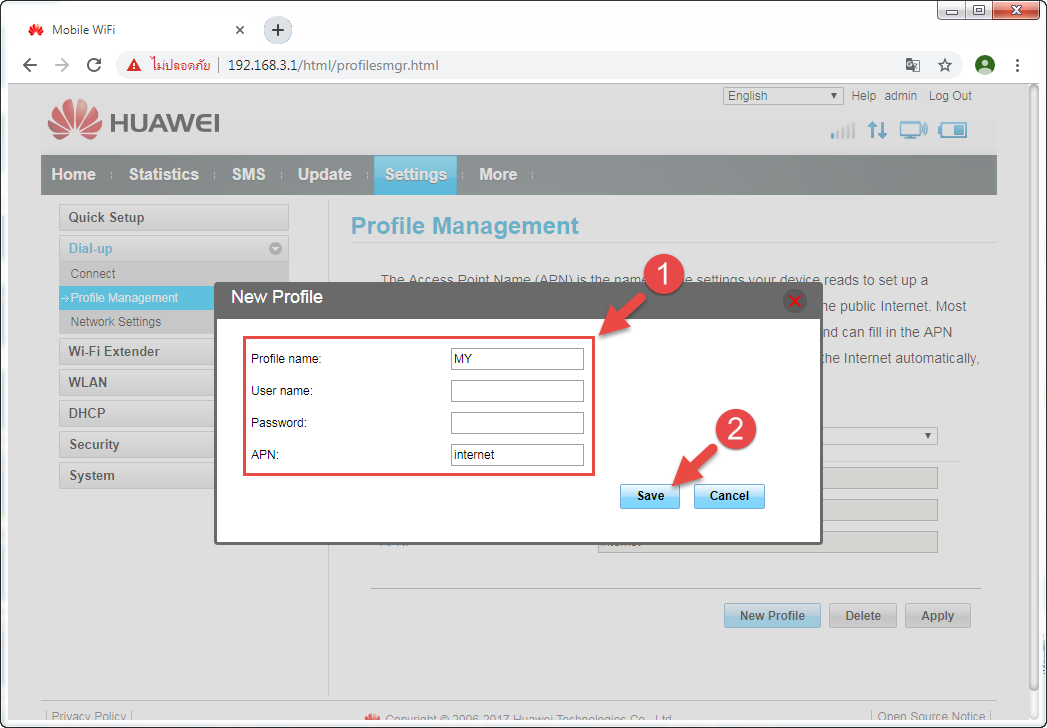
8. ตั้งค่า APN ตามนี้
- ซิม AIS ตั้งค่า Profile name = AIS, APN = internet
- ซิม DTAC ตั้งค่า Profile name = DTAC, APN = www.dtac.co.th
- ซิม TRUE ตั้งค่า Profile name = TRUE, APN = internet
- ซิม TOT ตั้งค่า Profile name = TOT, APN = internet
- ซิม MY ตั้งค่า Profile name = MY, APN = internet
- คลิก Save
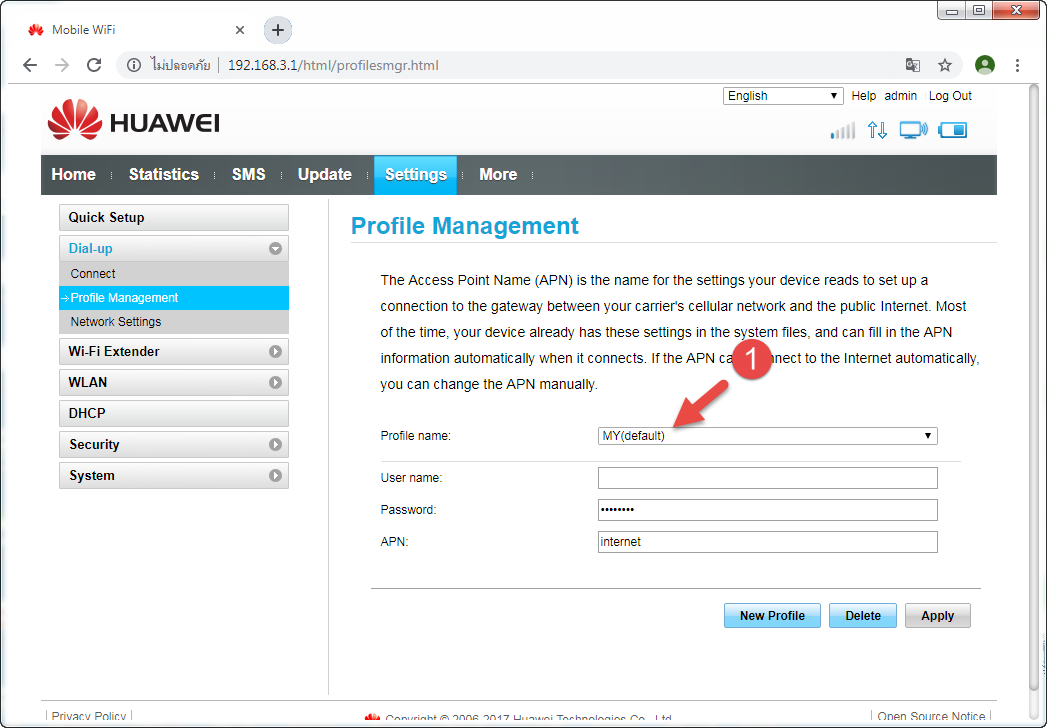
10. ตั้งค่าเสร็จแล้วจะได้ตามรูป
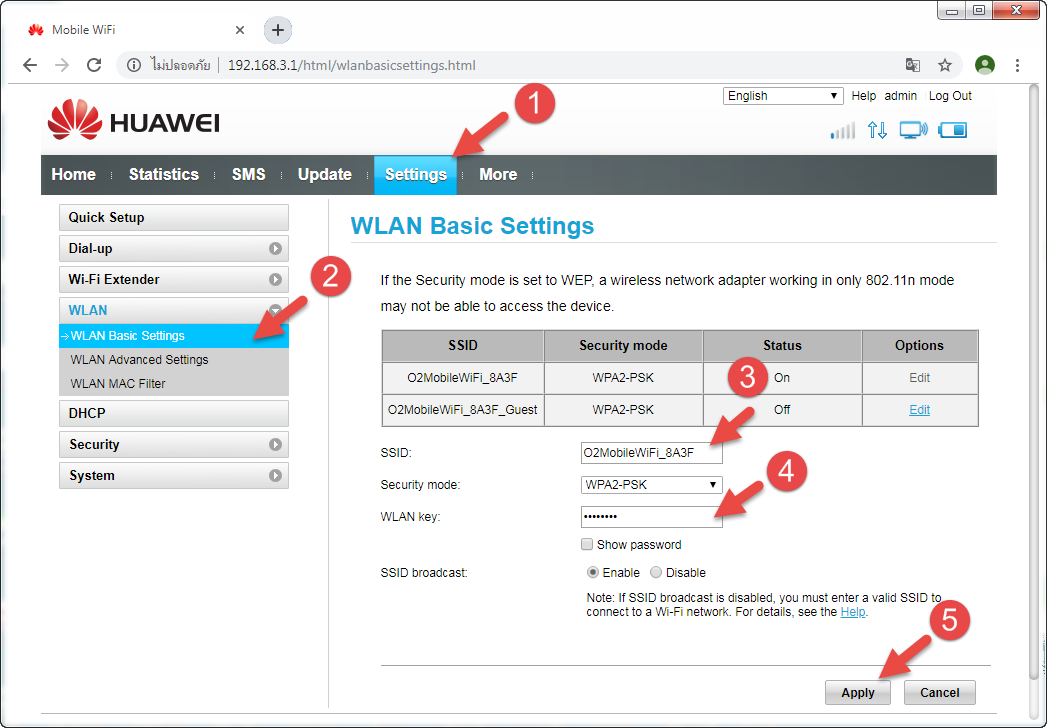
11. ตั้งค่าชื่อ WiFi และรหัสผ่าน
- คลิก Settings
- คลิก WLAN Basic Settings
- พิมพ์ชื่อ WiFi(SSID) ที่ต้องการ
- พิมพ์รหัสผ่าน(WLAN Key)ที่ต้องการ
- คลิก Apply
- รอสักครู่ ชื่อและรหัสผ่านจะเปลี่ยนเราต้องเชื่อมต่อ WiFi ใหม่ก่อนใช้งาน
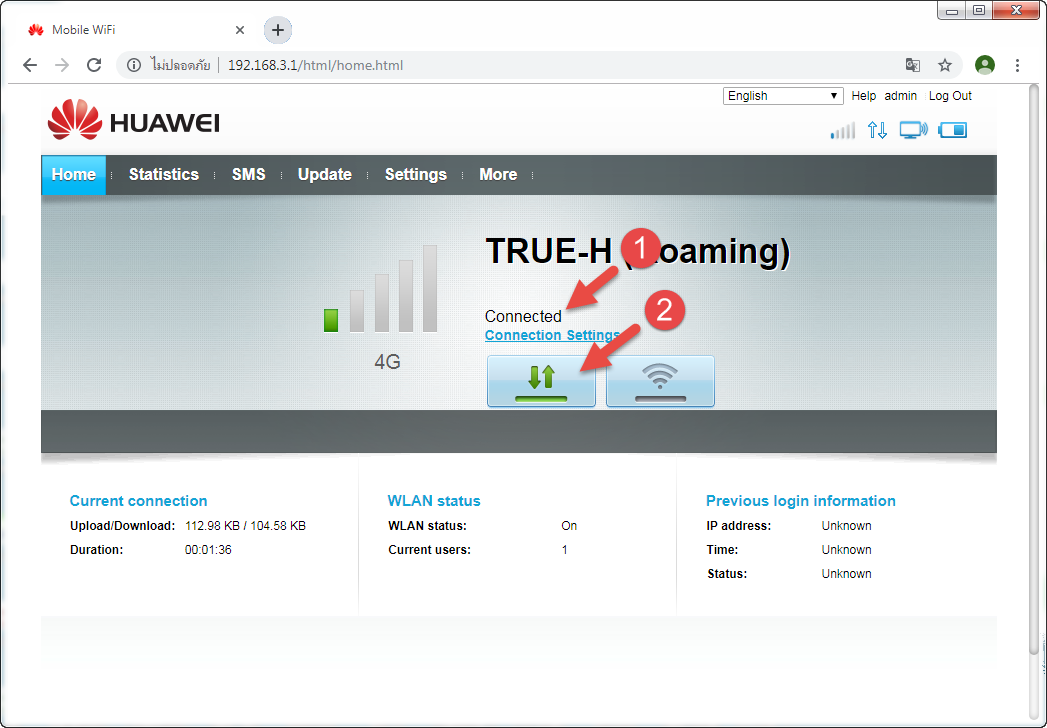
12. เมื่อตั้งต่าเสร็จเรียบร้อย มาดูที่หน้า Home จะขึ้นดังรูปนี้
- สถานะเชื่อมต่อแล้ว (Connected)
- สัญญาลักษณ์ Mobile Data เป็นสีเขียว บางครั้งเราเผลอไปคลิกปิดอินเตอร์เน็ตจะไม่เชื่อมต่อ ให้คลิกเปิด(สีเขียว)
